Small Intervention For Great Backgrounds
This workshop is suitable for beginners and medium level photographers. Any version of Photoshop should be sufficient for this workshop. Some basic PS experience required.
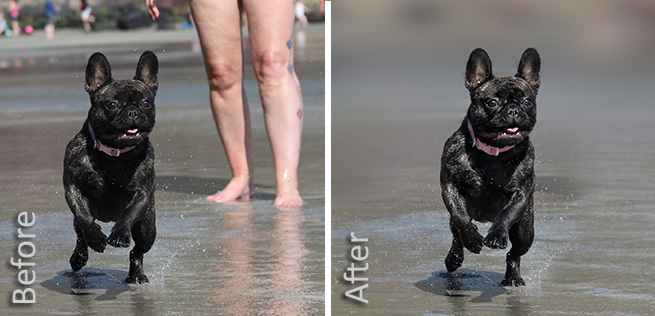 Before & After
Imagine you have taken a great shot of an animal/person doing something rather interesting. Your subject is beautifully sharp however the background lets it down because perhaps the sky, or a rock, or something/someone in the background is too bright. You clone out the bright areas however because of your lens quality or your aperture setting, the background is still too sharp and intrusive. Sorting this problem and producing a beautifully blurred background with minimun effort is what this tutorial is all about.
Having reached this tutorial on my page I don’t think you need a lecture in how important the background is! The background is especially important in people, action, nature, portrait or macro photography. This is because in these types of photography we usually have one object/person/animal etc. that is what the photo is about. The background in these shots usually takes a relatively large proportion of the total frame and it is crucially important in making the subject stand out.
The quality of the background depends on several factors ,of which some of the most important ones are:
· The actual background, e.g. sky, sea, mountain, trees, flowers, bushes etc.
· The distance you are from subject you are shooting.
· The distance between the subject and the background.
· The aperture used / the maximum aperture your lens is capable of.
· The Focal Length used
An experienced photographer with a super kit can control some of these variables better than an inexperienced photographer with an inferior kit, however even an experienced photographer cannot place a dog, cat or even a person exactly where he/she wants to!
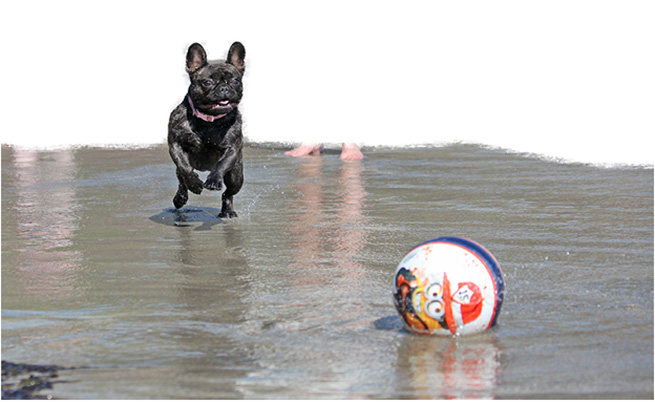
In this tutorial I will be using the photo of a rather cute French Bulldog called Leila. Leila loved jumping about and running after the ball on the beach. I took many a shot of Leila, they were beautifully sharp but because of many reasons the background was too messy, making Leila less important as should should have been! (See Original Image) To me this image is about that cute and excited look on Leila’s face, here pose and the water slpash. I needed a background that helps Leila stand out as well as looks soft and dreamy in int own right.
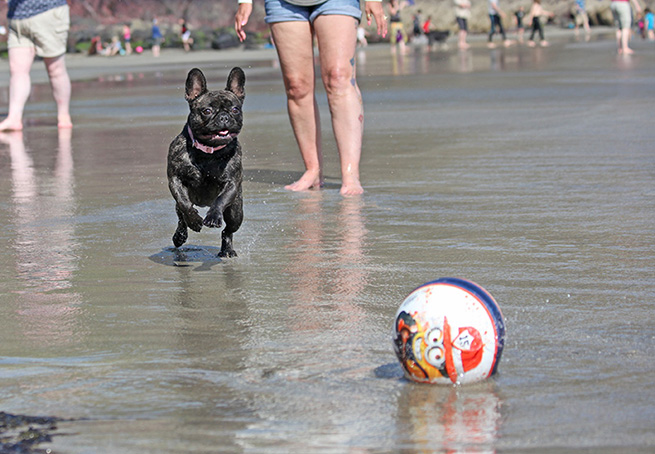 Original Image
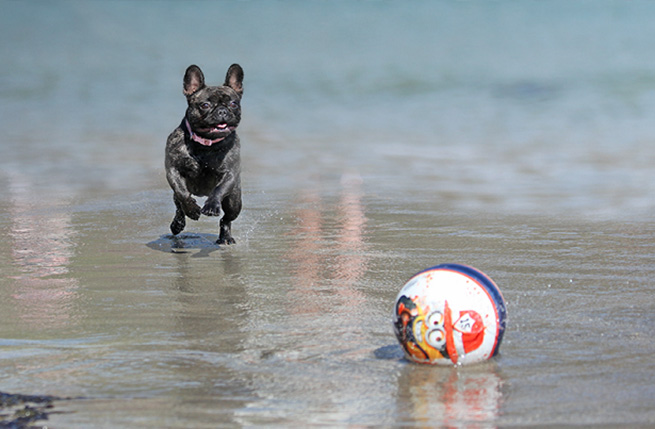
I set to improve this image and after about 10 minutes of work on PS here is the finished image.
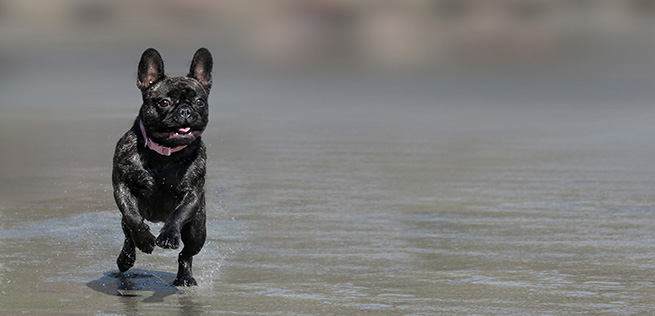 Processed Background
Step by step my technique.
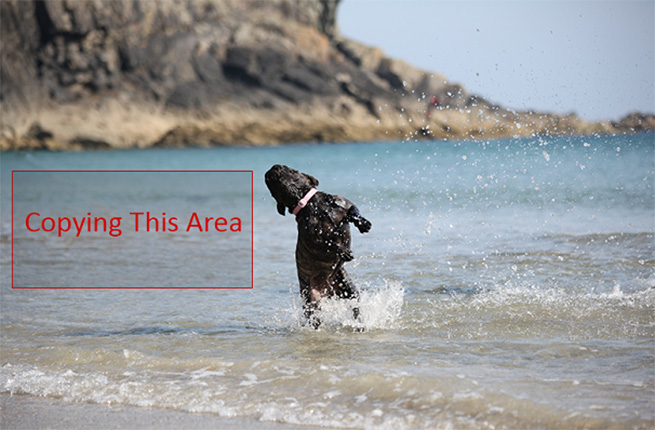
With the photo opened on Photoshop, hit CRTL + J to duplicate the layer layer. You need to somehow blur and sent the background out of focus. To do that you need to separate the part of the image you want to keep (the foreground) from the part you want to blur (the background). You can use many tools to do the extraction, I usually use Topaz ReMask however you can use PS Extraction and other methods (sorry image extraction is not part of this tutorial). Check out image below this paragraph – the red area represents the part of the background I will be removing and replacing.
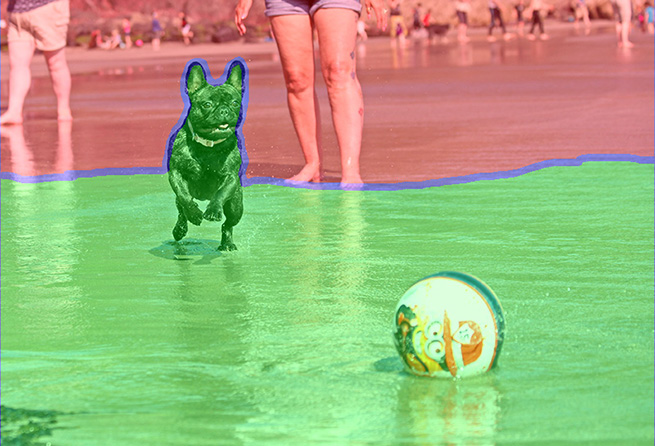 STEP 1 - Remove the Background that will be blurred from the photo leaving the foreground intact
After removing the existing background the image should look something like the caption below.
 After removing the background
In theory you can paste any background you like at this point. I usually use Gaussian or Lens Blur Tool to blur the Layer immediately under this layer, however in this case it would be impossible to properly blur all those feet and other colourful objects. So what I did is that I copied a section from another photo (the other photo was taken during the same shoot, from the same sequence of shots, because the same camera settings have been use in the same light conditions). See Figure below for the photo used.
 STEP 2 - Copy a selection of another (similar) image that will be used as the new background
I hope the reason I chose that area is obvious. It is very even and similar to what it will be used to replace. Also, there is already some blur on it taking it already half way there!
Paste the copied selection on to the main image and place it immediately underneeth the cut out image so that the new background showes through. We are almost done!
 STEP 3 - Paste the copied selection to our main image and place it under the cut out layer
Now all you need to do is some tiding up! Using basic tools like, cropping, the bluring filters, the clone tool, perhaps stretching the pasted background, working on the colours and transparency you can turn the image looking like it you had not done any photoshop processing at all and it was all done in the camera!
 STEP 4 - Tidy up the image!
We are located at:
Aleks Gjika EFIAP DPAGB
Gloucester
Gloucestershire
United Kingdom
Contact us today!
For all your photography needs, please contact me any time:
aleks.gjika@live.co.uk
Or use the Conctact Form

